
Our bathroom renovation
It was exactly a year ago since our old bathroom was ripped out as part of overall house renovation project, and I was so glad to see the back of it. Although it was perfectly livable and usable, we lived with the wonky floors, walls and a door for a year, plus the style and colour scheme wasn’t quite what we were looking for.
The whole room needed a complete overhaul, and we added it on as job for our builders whilst we were doing our kitchen extension.
I actually found the whole process of redesigning a bathroom pretty tricky. There are lots of parts, lots of plumbing to consider, lots of style, loads of colours to choose from. No longer did I want a chrome tap or shower head. I probably spent more time searching for gold taps than I did actually planning our kitchen extension, and that’s saying something. Instagram and Pinterest were my main sources of design and it’s where I fell in love with a black bathroom, plus we were also creating a black kitchen so why stop there.
The renovation
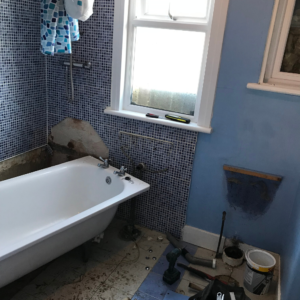
The renovation of our bathroom was a lot more than just replacing the suite and re-tiling. This room would have originally been two rooms and you could visibly see where the dividing wall had been and the walls patched up, with random patches of plaster and two different shades of blue. Why the room was completely repainted again as one room, I don’t know?
So along came our bathroom overhaul. Due to structural mess of the room and house (these old houses) we had to have the floor levelled to iron out the drop of 10cm from one corner to the other. We had all the walls plaster boarded so you could no longer see the bow in the back of the house, and we boxed in the curved chimney breast to make the walls straight again. At the same time we decided to move the doorway to the middle of the room to allow us to get in a seperate bath and shower. This also meant that I could no longer see the toilet from the bottom of the stairs. Hooray!
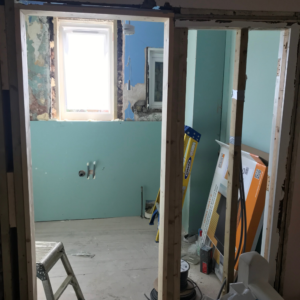
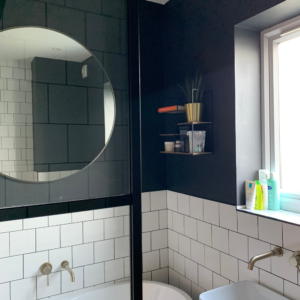
In addition to this we blocked up a small window to create more of a balanced feel either side of the existing larger window, and made the existing larger window shorter to allow a sink to be positioned underneath. Plus we added underfloor heating and updated the electrics to include four spotlights.
The design
As I mentioned at the start of this blog post I was very inspired with black bathrooms and scoured the internet and social media for inspiration. Some of my favourites included Gold Is A Neutral, Not Another Mummy Blog and At Lucys House where we all share a love of the same tile design and black bathrooms.
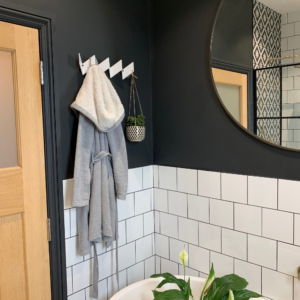
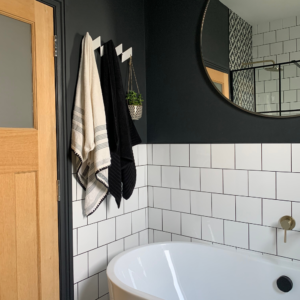
In the end I decided to go with a black and gold style. I think that our builders thought I was a little crazy when I came home with Farrow and Ball Off Black paint for the walls. But it works, and it works well.
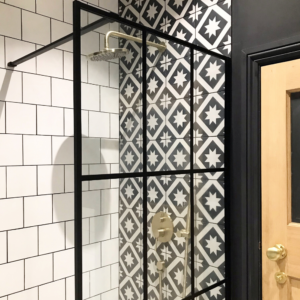
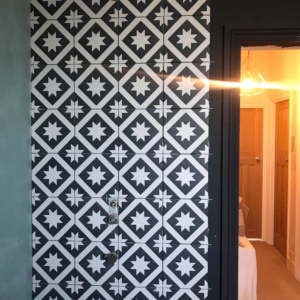
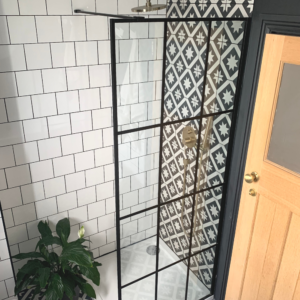
The tiles were slightly more tricky as there are hundreds to choose from. As I had already selected the hallway tiles I decided to stick with a tile pattern from the same range to help create consistency throughout the house. The tiles are different, yet the colours are the same. We opted for the Harlequin tiles in Decor 5 from Mandarin Stone for the floor and to run up the back of the shower wall. Then the rest of the walls are tiled in white square tiles from Victorian Plumbing with black grout.
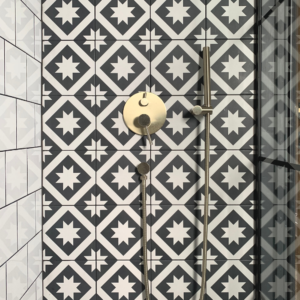
I really wanted to have gold taps and gold shower system in this room, but not a bright bright gold and I settled on the Jadipai Contemporary Bathroom Tap for the bath and the sink, and the Havasu Thermostatic Shower from Dowsing and Reynolds. The shower is then paired up with a crittal style shower screen from We Are Soak.
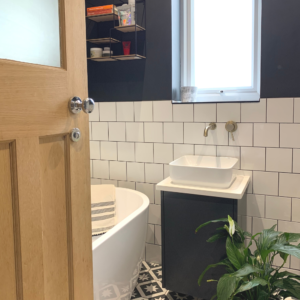
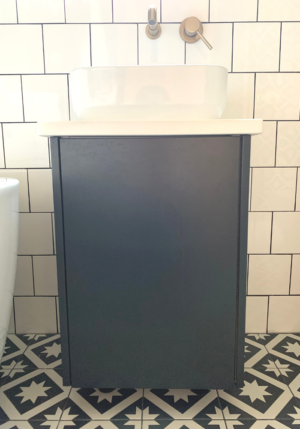
One of the trickiest things I found choosing was the sink and cupboard underneath. I searched high and low for black vanity units to house a counter top sink, which was really tricky to find. Most were either too traditional, the wrong colour, had the tap hole in the work top or were too wide. To combat this and because we had already IKEA hacked the kitchen, we created our own, by using an IKEA carcass and getting a bespoke door and sides made by our builder at the same time as the kitchen door and drawer fronts. The worktop was supplied by Rock and Co who supplied our kitchen worktop, and the sink is We Are Soak. It does sound complicated and fiddly for a vanity unit, but it shows that anything is possible and you can create your own.
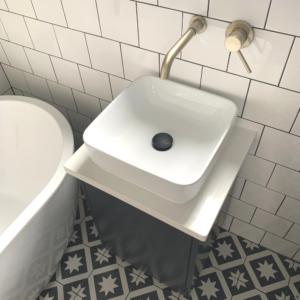
Last but not least is the bath which I wanted to be a freestanding bath, although one side is tight up against the wall, as we haven’t quite got the luxury of space in this room to have it entirely freestanding. This is the Verona bath from Victorian Plumbing.
So that’s our bathroom. It’s a compact room, that contains everything that we need. There is still some styling that I need to do to the room including adding some more plants and gold accessories to help bring the space together.
Some tips from me
- Don’t be afraid to mix metals. We have gold, black and chrome in the room. I never notice it or maybe I have just got used to it. Our click clack waste for our bath and sink is black as I was unable to purchase a waste to match the taps and shower. The shower waste is chrome which is fine as it reflects the pattern of the tiles.
- Go big and bold. There are so many adventurous tiles, tile colours and designs available. Have fun with them and choose something that is going to give the space some wow factor.
- Be practical. We have an 800×800 shower tray and an open shower, which is fine. Although water does splash out that I have to be careful about, and I always make sure a mat is put down on the floor. Luckily for us it’s not a shower that we use everyday, but in hindsight I probably should have made this room a wet room in this corner.
- If this is a new bathroom installation, you need to check that your current boiler is up to the task of an increased demand for hot water. You may need to get a new boiler with a higher output. How much a new boiler costs is dependent on your home, so it’s best getting a new boiler quote if you need to upgrade.
I hope that this has helped you with your bathroom renovation or given you some ideas and inspiration. If you want to see more have a nose at my IG TV where I am talking more about our bathroom renovation.
Claire x


7 Comments
Kim Carberry
Oh wow! It looks gorgeous! I love the colour scheme and the tiles in the shower. x
Lauretta
What a beautiful bathroom! You must be delighted with it. Just goes to show a little inspiration mixed with imagination goes a long way. We’ll done Claire!
Earthmoving Otago
Wonderful information about our bathroom renovation, thanks a lot for sharing kind of content with us. Your blog gives the best and the most interesting information. I wonder if we can gather such practical information about it, a great post definitely to come across.
Land Surveyors
This is a brilliant post, thank you for sharing about our bathroom renovation. We always tend to change something or the other in our house, thanks for this great advice.
heat pumps southland
This article provides details about the our bathroom renovation . I enjoyed reading this article and would suggest others it as well. Thank you for this article! This is really very informative for us and look forward to more such in future for all of us.
Paul Henderson
I wish more people would post valuable content about Cheap Bathroom Remodel. This is the first time I’ve been on your website, but after this, I doubt it will be the last time. https://www.longviewbathroomremodeling.com/
The Pramshed
Thank you!